For mounting the steppers, I cut a stack of 1/2" and 3/4" plywood squares 2 1/2" square. By testing various combinations of different thickness, I determined the right size for each stepper.
I marked the center of the square and drilled a 1.5" hole with a Forstner bit and drilled the four stepper mounting holes in each square. Glue, stack and press them together. When dry, cut a notch to allow the block to be slipped under the stepper. This is necessary because of that three-part coupling spider - you really need to get that assembled first, then slide the spacer under the stepper. The notch must be wide enough to allow the coupling to pass through.
To the left is my Z-axis stepper where you can see the stack of plywood for mounting.
To mount the motor, I used 10-32 x 3" machine screws. All I could find were round-head slotted screws, and the head diameter was a bit to big. A few seconds on the grinder and they fit fine. The screws to through the axis assembly - I pressed in four T-nuts. (for the Z-axis, the T-nuts were pressed into shallow holes bored into the plywood.
Wednesday, March 31, 2010
Connecting the drive screw part II
Sometimes I get an idea in my head and I can't seem to see other alternatives. As I mentioned yesterday, the quick-and-dirty X-axis coupling nut broke off the X-axis assembly. So I pulled out my wire-feed welder and welded a mending brace across the coupling nut. This should last longer then the rest of the assembly!
My welding skills are pretty much non-existent, but it should hold.
Had to take the whole damn thing apart to get to the broken epoxy joint. Here's the half-assed epoxy job with the fixed drive screw shown in the inset image.
My welding skills are pretty much non-existent, but it should hold.
Had to take the whole damn thing apart to get to the broken epoxy joint. Here's the half-assed epoxy job with the fixed drive screw shown in the inset image.
Tuesday, March 30, 2010
Connecting the drive screw to the axis assembly
I have seen many clever ways to attach the drive screw to the axis'. The more durable the connection, the better. I took a 'cheap-and-dirty' approach that I will no doubt pay for later.
I used a coupling nut and attached this to each of the three axis assemblies.
I cut matching dados into one part of the axis assembly and a smaller "cover", shown at the left. I sized everything for a very snug fit. Using a chisel or sharp knife, I notched the bottom of the dado (image on the right) to accept the point of the coupling nut. I added liberal epoxy around the coupling nut and glued and pressed the two parts together.
I selected a dado over drilling through the piece because, as I was using plywood and not MDF, I couldn't get the drill bit to track perfectly straight through the center of the plywood.
Note: for the X-Axis, I just did the dado and epoxy with no 'cover' glued and pressed over the coupling nut. the epoxy just broke loose two nights ago. I will design a much more robust attachment.
To the right is a photo of my Y-axis drive screw. You can see the dado in both pieces.
Backlash: Yes, I am aware that this type of nut is not ideal and that it can fall prey to excessive backlash. As the first version of my router is my "proof of concept", and I'm not machining to the micron, I don't currently care about the tiny bit of backlash present. I must say, however, that it's not too bad. We'll see after 10,000 cycles how it looks and feels!
Saturday, March 27, 2010
Drive Screws
There are three drive screws needed (one for X, one for Y and one for Z-axis). I used 1/4-20 threaded rod from Home Depot. Make sure to get them long enough - and keep them a bit long until you are 110% sure your design is set. Threaded rod is easier to make shorter than it is to make longer.
I finished the ends of all the drive screws the same way - with two nuts turned into each other. The second nut is referred to as a " jam-nut". This locks the two nuts in place very effectively. Notice the bearing is always towards the "inside" of the two nuts.
The bearing is a R4ZZ (1/4"x5/8"x0.196" Shielded) from VXB Bearings. 10 bearings for about $15.
Where I mounted the bearings, I used a 5/8" Forstner bit to bore a hole just deep enough to hold most of the bearing. Then I finished by drilling a 1/4" hole for the drive screw. It's a little difficult to see in the drawing, but the photo shows the double-nut arrangement and the bearing is counter-bored almost completely into the plywood. (this is the end of my Y-Axis drive screw). Sometimes I used a washer between the nut and the bearing, but It didn't seem to make any difference so I ended-up going without a washer.
A trick to remember when cutting the all-thread: Put a nut onto the bar before you cut the threaded rod. Cut the rod and file the end to clean off the burs & junk. Then, by taking off the nut, you will clean-up the threads (somewhat) where you cut them. Not perfect, but better than nothing!
I finished the ends of all the drive screws the same way - with two nuts turned into each other. The second nut is referred to as a " jam-nut". This locks the two nuts in place very effectively. Notice the bearing is always towards the "inside" of the two nuts.
The bearing is a R4ZZ (1/4"x5/8"x0.196" Shielded) from VXB Bearings. 10 bearings for about $15.
Where I mounted the bearings, I used a 5/8" Forstner bit to bore a hole just deep enough to hold most of the bearing. Then I finished by drilling a 1/4" hole for the drive screw. It's a little difficult to see in the drawing, but the photo shows the double-nut arrangement and the bearing is counter-bored almost completely into the plywood. (this is the end of my Y-Axis drive screw). Sometimes I used a washer between the nut and the bearing, but It didn't seem to make any difference so I ended-up going without a washer.
A trick to remember when cutting the all-thread: Put a nut onto the bar before you cut the threaded rod. Cut the rod and file the end to clean off the burs & junk. Then, by taking off the nut, you will clean-up the threads (somewhat) where you cut them. Not perfect, but better than nothing!
Wiring the steppers
Here is the wiring diagram. Depending on your definition of "forward" and "backward" or "up" and "down" - your steppers may end up going the "wrong way". The best choice is to see if you CAM software can invert the outputs. Or you can swap the stepper windings. It's not obvious what to do, if you need to know, drop me a line and I'll draw the "swapped" version.
The nature of this type of project is that it goes together - and it comes apart. Often. So I used connectors (from Jameco) that had enough pins (9) and sufficient current carrying capacity. Get at least one M and one F for each motor, you need to order the individual pins and sockets a-la-carte. Get an extraction tool also. If you have the extra $, the proper crimping tool would be nice too.
Here's the Y-Axis motor showing the 9-pin Molex connector. I opted for the 9-pin connector vs. a 6-pin as I am planning to run my limit and/or home switches through the same connector.
Stepper motors
I purchased the steppers from Keling. I got three KL23H276-30-8A steppers - 8 wire, 1/4" Single Shaft with flattened area on shaft.
Steppers were delivered quickly, although their packaging for shipment was not ideal and the steppers were pretty much "flopping around" inside the package. All seemed OK, and the steppers are working perfectly.
You can also secure steppers from HobbyCNC - if you think you will be needing support from Dave at HobbyCNC, then it might make excellent sense to secure as much as possible from him.
To connect the steppers to the drive screws, I used a device called a "shaft coupler with rubber spider" - it's a three-piece arrangement that provides a rubber 'spider' that isolates the motor from the drive screw - allowing for some minor mis-alignment between the drive screw and the motor shaft as well as some forgiveness in distance between the motor shaft and the drive screw. These are available from Jameco. Just search for "spider". For each stepper, I used two PN 162270 (.250" ID hub) - labeled in the image below as "couplers" and one rubber spider.
Here's the spider assembly in use. The set-screws (visible in the photo above) in the coupler were pretty small, and there is only one, so I drilled-out the existing hole an re-tapped at 6-32, and added a second set-screw at 90 degrees, just to be safe. This device is going to take a beating.
The electronics
I purchased the HobbyCNC PRO Chopper Driver Board Kit from HobbyCNC. The price was good and delivery was quick. Kit went together with clear assembly instructions.
HobbyCNC has a new board, with fewer features that would most likely work just as well: HobbyCNC EZ Driver Board Kit. $64 vs $79.
I managed to blow one of the driver chips, though I tried to be ultra-careful. I replaced the chip, added a big heatsink, and all is now good.
Here's the bare board. The quality is first-rate, as are the assembly instructions. Take your time, double-check everything.
I checked every solder joint under an inspection microscope - my soldering skills are excellent, however my eyesight is not.
Pay attention for any solder bridges or cold-solder joints.
The completed board "in action". For the heatsink, I used the same material that was used for the linear bearings and the rails. I put some heatsink paste between the driver IC's and the heatsink. I'm sure all the sawdust isn't ideal, but I'm not done yet!
Progress so far
All the major axis' have been cut and assembled, and the entire project is now beginning to look like a real 3-axis router. Still no motors, drive screws or electronics, but it is fun to slide all the parts around. The real challenge is trying to explain to your friends and family what this gizmo does and what it's for. The most common question: "What'er you gonna make with it?". Love 'em, but they just don't get it. It's the building that's the fun.
Friday, March 26, 2010
The Base
The base of the entire system must be rigid (no bending or flexing), but I didn't want it to weigh a ton, nor did I wish to use steel. So I went with an old furniture makers trick - a torsion box. If you are interested in the details, check out this really great and quite entertaining site: thewoodwhisperer.com. Mark shows the construction and benefits of a torsion box.
First, let's look at a drawing of the complete base. Here is a front, side and bottom view. This will be helpful in explaining the construction of the torsion box. I did mine differently than Mark did on thewoodwisperer, but the idea and results are the same.
Cutting diagram. I went with cutting notches in all the cross braces so the framework slipped together snugly - I added glue to all the joints and used wood screws around the perimeter.
It is as solid as a rock. There will be some trimming necessary for the base to make sure of a solid fit against the bearings on the X-Axis assembly, so you might make it a bit bigger than the 22 21/64" that I had so you can trim off bits until the fit inside the X-Axis assembly is perfect.
Since the assembly of the torsion box may not be too clear, here is an exploded assembly drawing.
Here's an underside-shot of the base. I am sorry to say I don't have any 'under construction' images.
X-Axis rail
This is the final assembly that hold both the Y and Z-Axis assemblies. By now, the concept is pretty familiar.
The positioning of the Y-Axis rail is 1.5" in from the back and the height depends on the type of router you are using. For a little router, like a Dremel or a laminate trimmer, the Y-Axis rail will move closer to the table top, for a larger router (I used an old Craftsman router I inherited from my dad), the rail will move farther away.
Here's all three axis' together for a test fit (again, still with wood screws). This is where you begin to see the project really start to come together. Still no motors or electronics, but pretty cool nonetheless.
Y-Axis Rail
The Y-Axis rail is the track upon which the Y-Axis assembly will slide. Cut two aluminum angles the length of the Y-Axis rail.
As with the front of the Y-Axis assembly, there is the same "flat spot" on the 45 degree beveled top-and-bottom of the rail.
The aluminum angles just sit on the rail. They will get firmly captured in place and will not move around once it's all put together.
Here's the Y-Axis assembly and the Y-Axis rail together, from two different views.
Here's my initial test-fit of the Y and Z-Axis components. In this early version, I had used wood screws instead of the cross-dowels. After lots of screwing and un-screwing, I converted to the cross dowels. So much nicer.
You may be wondering why I used plywood instead of MDF (Medium Density Fiberboard) like everyone else. Being basically cheap, my next-door neighbor had just finished a kitchen remodel and he gave me loads of left-over plywood. Pretty easy decision.
Y-Axis Assembly
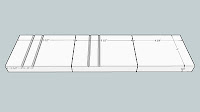
The Y-axis cutting guide, including the aluminum angle brackets. The angle brackets are the same throughout this project, both for the linear bearings and for the mating surface. With the 'front' and 'back' parts, you may need to 'futz' with their length in order to secure a good, solid fit against the Y-axis frame. At this point, I have not included instructions for where/how to mount the nut that accepts the drive screw. I'll get to that later.
Notice the detail when cutting the front. I set my table saw for 45 degrees (you can also use a router with a 45 degree bit and a guide bearing). I left small flat ends on each side (detail inside circle), not a sharp point. This is to allow a good, straight surface to rest against the fence of the table saw (or the bearing of the router bit).
Here is the entire assembly. Again, you may need to 'play' with the length of the front and back to secure a good, solid fit of the bearings against the Y-axis rail.
Now you can trial fit the Z-Axis assembly onto the "front" of the Y-axis. Again, some experimentation with the width of the Z-Axis to fit snug.
Thursday, March 25, 2010
The Z axis assembly
Here is the cutting guide for the first part of the Z-axis. The second part, the router mounting bracket comes later in the process, depending on the type/size of the router and how far your Z-axis assembly ends up from the table. You will want to make all 4 of the pieces that hold the linear bearings at the same time as they are almost identical for both the Y and Z-axis assemblies (Z-axis is 1/2" longer than the Y-axis part).
I have the luxury of a table saw, which I used to make the grooves to hold the linear bearings. To make my life easier, I made a small shim, 0.90" wide that I used to get perfect spacing between the grooves. One pass with the shim, second pass without and we're all good.
I set the blade to 45 degrees, and set it to just make nice 90 degree notches. The linear slides can be left loose, but it makes assembly of the pieces a 3 or 4 handed job - a touch of epoxy held them nicely in place.
Here is how it all goes together, using the cross dowels. The open end will be "filled" later with the router mounting bracket.
I have the luxury of a table saw, which I used to make the grooves to hold the linear bearings. To make my life easier, I made a small shim, 0.90" wide that I used to get perfect spacing between the grooves. One pass with the shim, second pass without and we're all good.
I set the blade to 45 degrees, and set it to just make nice 90 degree notches. The linear slides can be left loose, but it makes assembly of the pieces a 3 or 4 handed job - a touch of epoxy held them nicely in place.
Here is how it all goes together, using the cross dowels. The open end will be "filled" later with the router mounting bracket.
Holding it all together
I opted to use a "cross dowel" to allow for a strong connection that can be easily and quickly assembled and dis-assembled. A cross dowel is a small metal rod, with a 1/4-20 threaded hole through it and a slot cut across the top to aid in alignment. I got mine on sale at Rockler woodworking (www.rockler.com).
Since many of the assemblies were too large to fit in my small benchtop drill press, I made a quick-and-dirty drilling jig that worked perfectly. I used brass inserts (1/4" and 3/8") to protect the wooden jig from repeated drilling. I clamped the pieces together, with the drilling jig and - perfectly aligned holes, every time.
Here's how the finished product came out. They are nice and flush with the wood surface, hold the thing together beautifully and are easy to un-do and re-do quickly and neatly.
Wednesday, March 24, 2010
Y and Z axis linear slide bearings
I used 3/4″ aluminum angle stock from Home Depot. It is important to drill holes off-center, closer to the corner of the L.
Click the image for a larger view. (Note: You may want to stagger the holes so the bolts do not bump into each other when assembled. I was lucky and my bolts just missed each other)
I got clever and did my first set of brackets with the holes centered on the side of the bracket – and it didn’t work. You can see from the photo that the two angle brackets hit each other. Too bad I made all 4 brackets before I tried them out.
The holes are drilled and tapped. I used bearings from VXB Bearings.com (www.vxb.com/). The price was great, less than $4.00 for 8 bearings. Delivery was very quick. Article number sk8zz – 8 Skateboard Bearings 608Z Shielded.
Be sure to either use a template or a drill press to get the holes placed as accurately as possible. This way the bearings will ride evenly on the track. You’ll need to make 4 of these.
Drill the holes at 17/64" and tap 5/16-18. A 5/16" bolt has a diameter of .3125" and the inside diameter of the sk8zz bearings is .3150" (8mm) - a very nice fit. Attach the bearings with a 5/16-18 x 3/4" bolt, capturing the bearing between a nut and the bolt head. No washer is used.
The 8 inch X axis linear slide bearings are identical in design except they are, you guessed it, 8 inches long.
Here's how the finished bracket rides on the opposing rail.
All bearings contact nicely and the two angle brackets are now nicely separated.
Build your own CNC machine
I was looking for an interesting project that would combine several of my hobbies. I found a “build your own CNC machine” posting at buildyourcnc.com. It seemed straight forward enough and worth a try. First was to build the “Linear Bearings". Pretty basic affair. It is really helpful if you have a drill press.
Subscribe to:
Posts (Atom)